No matter how well-made your cabinets are, they will wear out and look rundown over time. When that happens, your options are to buy and install new cabinets or to refinish them.
Refinishing enables you to restore the appearance of your cabinets and make them look new again. A cheaper alternative to purchasing new cabinets, refinishing is also a simpler solution that won’t tie up your kitchen in a lengthy renovation process.
What is refinishing?
Refinishing is the process of applying new paint or stain to cabinets to restore or otherwise improve their appearance. It often involves sanding or stripping off the existing paint or finish before applying one or more coats of paint or stain. If necessary, the cabinet doors and drawer faces may be removed before sanding or application of the new coat of paint.
Some homeowners opt for cabinet refacing instead of refinishing. Also known as ‘resurfacing’, refacing involves installing doors and drawer faces to cabinets in place of the old ones. If necessary, the cabinets are painted or stained to match the new doors and drawer faces.
Assessing the condition of your cabinets

Before you decide to refinish your cabinets, it is worth taking the time to evaluate their condition so you can decide on the most appropriate course of action to take.
If you would prefer to refinish your cabinets instead of refacing them, make sure that the doors, drawers, and the cabinet walls are in reasonably good condition. If the doors and drawer faces are damaged beyond repair, you might have to replace them.
You will likely want to retain your existing cabinets unless you are replacing them entirely. Whether you opt for refinishing or refacing, make sure that the cabinets are still able to support considerable weight.
Check the inside of each of your cabinets for any sign of structural damage. Loose joints or cracked side panels may require extensive repair or replacement. Try poking around the cabinet’s interior as well. This will enable you to detect soft or spongy sections that could indicate water damage or wood rot.
Base cabinets are especially prone to water damage, particularly those that are installed under the sink. If the cabinet bottoms are sagging or dislodged rather than firm and flat, they may have been damaged by frequent exposure to water or moisture.
Upper cabinets should be securely fastened to each other and to the walls behind them. If your cabinets have face frames, they should be attached firmly to the cabinets, and have smooth and flat corners and edges. If there are small cracks or holes, these can usually be fixed easily by filling them with wood putty. If the face frames have larger cracks or are split into sections, they will have to be replaced.
Fixed shelves should be securely attached as well, with no signs of looseness, warping, or cracking.
Make sure that your drawers are in good condition as well. Each should open fully and close completely, and roll smoothly along the rails.
You may also want to check the structural integrity of each drawer by removing them from the cabinets and inspecting them one by one. Pay particular attention to the joints, which should be connected tightly together. The bottoms of each drawer should fit securely in the drawer box and not show any signs of cracking or sagging.
Inspect the drawer slides as well, which are typically made of wood or metal. Like all the other components of the drawer, they have to be in good condition and attached firmly to the cabinet. Make sure that there are no loose or missing fasteners, and that they aren’t damaged or worn.
After you have evaluated the condition of your cabinets, you can decide on a plan for refinishing.
Refinishing your cabinets by staining
Staining is the process of applying a tinting compound to the wood. Unlike painting, staining retains the appearance of the wood while changing its color subtly.
The staining compound is typically brushed on to cabinet’s surface. Any excess stain is then wiped off with a clean piece of cloth.
Staining usually involves more preparation than painting, especially if you are applying a different color of stain. The style of the cabinet will also affect the amount of time it will take to complete the job. Cabinets with intricate designs and raised panels will take longer to stain than cabinets with relatively simple panels.
Here’s how to stain your cabinets:
1. Remove the doors and the drawer faces. If the drawer faces cannot be removed from the drawer box, you will have to pull the entire drawer out.
2. Remove the knobs, pulls, hinges, and all the other hardware.
3. Clean the surfaces of the cabinet thoroughly with a mixture of one part trisodium phosphate and four parts water. It will be easier to apply the solution onto the cabinet with a plant mister. You can then scrub the grime off with a sponge and then dry the sprayed surfaces afterward.
4. Now is the time to figure out how much of the existing finish you have to remove. If you plan on staining the doors and drawer faces rather than painting them, you will have to sand all the surfaces down to the bare wood. Only the parts of the cabinet that are exposed will have to be sanded down.
5. Sand the cabinets with 100-grit sandpaper initially, then switch to 120- and 150-grit paper afterward. You can use a sanding sponge or a hand-sanding block, although a power sander will enable you to get the job done a lot more quickly. If possible, use an orbital finishing sander or a random-orbit sander, which will let you sand in the corners.
6. After you are done sanding, you can apply the stain by rubbing or brushing it on. Let the wood absorb the stain for about ten minutes then wipe off any excess with a clean piece of cloth.
7. You can apply a second coat of stain if you want the cabinet darker. You can apply as many coats as you wish to get the tone that you want, but wipe off the excess stain after every application. When you are done, allow the cabinets to dry overnight.
8. After the stain is completely dry, apply satin polyurethane varnish onto the stained surfaces with a foam brush. Allow this first coat of varnish to dry before sanding the surface lightly with 220-grit sandpaper. Wipe off the dust thoroughly and then apply another coat of varnish.
9. The last step is to reattach the hinges and replace the doors onto the cabinets. You can then either reinstall the knobs and pulls you removed initially or install new hardware.
Refinishing your cabinets by painting

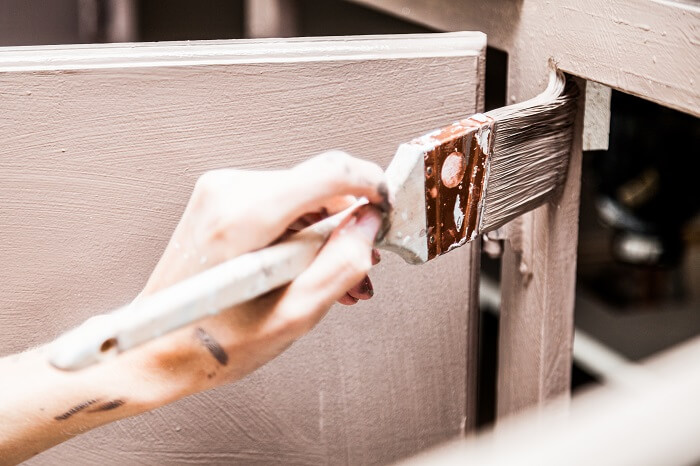
Painting your cabinets will result in a more significant change to their appearance than you could achieve with staining. Here are the steps for painting your cabinets:
- The first step is to clean the cabinets thoroughly of dirt and grime. For best results, use a scrubbing sponge and a grease-cutting cleaner, wiping down all the surfaces you plan to paint.
- At this point, you can sand the cabinet down following the steps outlined in the previous section on staining. Alternatively, you can use a liquid deglosser and apply it onto the surfaces to be painted with a washcloth. You can achieve the best results by applying the deglosser in small, circular movements.
- The next step is to remove the doors and all the hardware. Consider labeling each door with painter’s tape to make it easier to figure out where each one goes after painting. Remove the hinges and other hardware as well.
- Pull out any removable shelves and clean the inside of the cabinets. Make sure to wipe down any surface that you will be painting.
- Begin painting by laying the cabinet doors flat on your work table, with the back surface facing upward. Apply a coat of cabinet enamel with a roller.
- Before flipping the door over to coat the other side, push thumbtacks into the corners to keep the freshly painted surface off the work table. This will prevent you from messing up the enamel while you paint the front of the door.
- If there are any moldings and detailed areas, now is the time to coat them. Use a small paintbrush to avoid messing up the sections that you have already painted.
- Now you can apply the paint to the cabinet. A roller will give you smoother and more even results. If you need to apply a second coat, make sure that the first coat has dried completely.
- Paint the shelves following the same procedure described above. If you are applying more than one coat, make sure that the shelves are thoroughly dry before applying a subsequent coat of paint.
- If you are painting any of the hardware, now is the time to do so. Otherwise, you can proceed to the next step.
- Paint the inside of the cabinets with a roller. Now is also when you should paint the outer edges of the cabinets and the shelves. Don’t forget to paint the center strip where the cabinet doors will meet when they are closed!
- After all of the painted sections are dry, you can reattach the hinges, knobs, and other hardware. Insert the shelves into the cabinets and you are done!
Other ways to improve your cabinets’ appearance

Refinishing is a great way to breathe new life into your cabinets and it will likely cost you much less than a new set of replacement cabinets. But there are many other ways by which you could improve the appearance of your cabinets apart from a full-blown refinishing job. Here are a few ideas:
Add strategic lighting
Lighting serves more than a practical purpose. Task lighting improves the appearance of your cabinets as well as the entire room. The effect can be especially impressive if you set up the lights to come from different directions. Consider installing dimmable lighting that you can turn up as needed and turn down when settling down at night.
Remove the doors
Open shelves can lighten the appearance of a heavy, closed-off kitchen considerably and make it easier to store and retrieve items that you use frequently. In fact, these types of shelves are better suited for items that you always use and need frequent access to.
Add glass inserts
Glass can be an attractive alternative to standard refacing options. Apart from the standard plain clear glass, you can liven up your cabinets with etched, fluted, or crackled glass. You could also consider colored or patterned glass, which will look especially striking with interior lighting.
Install roll-out shelves
Roll-out shelves can add a lot of functionality to standard kitchen designs and they look great as well. These types of shelves don’t necessarily have to be expensive and they can be installed fairly easily with a few simple tools.
Replace doors with chicken wire
Chicken-wire might seem an odd choice for dressing up kitchen cabinets, but they can provide a charming, rustic look. These elements are especially well-suited for farmhouse kitchen-style designs.
Add crown molding
Crown molding can be a great way to make standard drab-looking cabinets classier and more stylish. They can also add some height to your cabinets, and make them better suited for traditional-style kitchen designs.
Add lid storage
Stashing pots and their lids into small cabinets can lead to an unorganized mess. You can clear up some space by installing a rack from which you could hang the lids. Apart from freeing up space, this could also make the interior of the cabinet door more attractive.
Add a spice rack
Alternatively, you can dress up the back of your cabinet door with a spice rack. This provides you the same space-saving benefits as a lid rack, with an arguably more attractive decorative element for your cabinet door. A spice rack also keeps your spices at eye level where you can easily read the labels and pull out what you need.
Ace Hardware
Changing out your hardware is a quick and relatively easy way to freshen up the appearance of your kitchen cabinets. Knobs and pulls are always prime candidates for replacement but look into fresh new options for replacement hinges and fixtures as well. As with other elements of your kitchen, make sure that the new hardware complements the cabinet and the rest of your interior design.
Add interior wallpaper
Consider dressing up the interior of your cabinets. There are many options in “peel-and-stick” wallpaper these days, and some of them can look very impressive. With so many different patterns available, it will be easy enough to find a few that will go well with your kitchen design.
Install additional shelves
Don’t neglect the space under the upper shelves of your cabinet. Often ignored, this space is ideally suited for storing items such as mugs, small plates, baking sheets, and other kitchen stuff that you don’t use very often but want to have easy access to. Under-cabinet shelves also offer the added advantage of extra storage space without taking up any more space in your kitchen.